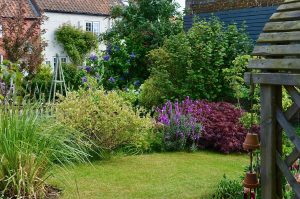
Every livestock operation has at least one spot that “takes one for the team” in winter.
It might be:
- A sacrifice lot where cattle or horses are fed when fields are too wet
- A sheep or goat area close to the barn for bad weather
- A dry lot for wintering heifers or 4H animals
- A small paddock near the house or barn where the ground is convenient, but the soil pays the price
By the time spring arrives, these areas often look rough:
- Bare or nearly bare soil
- Deep manure and bedding mats
- Puddles that linger long after the rest of the farm has dried
- Compaction from hooves, tractor traffic, and feed equipment
You know that if you just “turn them out and hope for the best,” you will get:
- Weeds instead of forage
- Mud and erosion with every rain
- Nutrient losses from manure and urine that should have been an asset
This article walks through a practical, step by step plan to bring sacrifice areas and winter feeding pads back toward healthy grass using Supply Solutions products such as:
The goal is to turn “that muddy winter mess” into a functional grassed area again, not in one miracle pass, but through a realistic one to three year rebuild plan that respects your time, budget, and livestock needs.
Step 1: Decide What Each Area Should Be In 1 To 3 Years
Before you move a fork of manure or open a fertilizer bag, ask a simple planning question:
“What do I want this spot to be doing in the next three springs?”
Options include:
- A healthy grass paddock that can safely carry animals in rotation
- A firm, well drained sacrifice lot that stays mostly bare by design
- A mix, where part becomes grassed and part stays as a high traffic pad
Your answer will shape everything else.
- If an area will always be used as a heavy traffic winter pad, you still want to manage nutrients and structure, but you may not need a full reseeding program.
- If you want it to become productive pasture again, you will invest more in soil building, fertility, and seed.
It often helps to sketch the area and divide it into:
- “Permanent heavy traffic” zones (gates, feeders, water, barn doors)
- “Recoverable grass” zones where you can realistically grow forage
You will manage those two zones differently.
Step 2: Clean Up Winter Residues Without Losing Your Nutrient Bank
Winter feeding areas collect useful nutrients in messy ways.
You might see:
- Deep mats of wasted hay or straw
- Manure piles, either spread by hooves or concentrated in spots
- Ruts and humps from moving feeders and equipment
The first job is to get the area to a condition where you can see the soil surface and work it lightly without burying problems.
Practical approach:
- Remove heavy, uncomposted piles
- Large clumps of spoiled hay or bedding that will not break down quickly can be moved to a compost area and handled there.
- Leaving a few inches of mixed manure and bedding is usually fine. The goal is to remove what will smother or shade out seedlings.
- Level ruts and humps
- Use a blade, loader, or harrow to knock down the worst ruts and ridges.
- Avoid deep tillage if you can. Heavy inversion on already tight soil can make structure worse.
- Leave a thin, even residue layer where possible
- A light mat of broken bedding and manure can help protect the surface, feed biology, and hold moisture for seeds later.
Do not feel like you have to scrape every bit of organic material away. You paid for that hay and bedding. The nutrients are valuable if you can help them become part of better soil.
Step 3: Assess Compaction, Drainage, And Salt Or Nutrient Imbalance
Once the surface is manageable, it is time to ask, “What is really holding this soil back?”
Check three things.
Compaction and structure
Push a probe, shovel, or even a piece of rebar into the soil.
- If you hit a hard layer just a few inches down
- If the shovel slice is shiny and smeared instead of crumbly
- If water ponds after small rains
then compaction and poor aggregation are major issues.
These areas will benefit from:
- Controlled traffic in the future
- Structural amendments such as gypsum where soils and tests support use
- Organic matter and humic inputs to help build better aggregates over time
Water movement
Watch how snow melt and spring rains behave.
- Do certain parts of the lot stay wet long after others are dry
- Does water flow through the area on its way to another field or ditch
- Are there places where a simple shallow swale or surface drain would move water off more effectively
Sometimes the cheapest fertility “product” is a shovel, blade, or tile line that lets water leave in a controlled way instead of standing and suffocating roots.
Manure and urine concentration
Winter pads often have nutrient hot spots.
You may notice:
- Areas where animals loafed or lay down most of the time
- Feeders where manure and wasted feed piled up
- Water points where wet soil and manure mixed all season
These spots can have:
- Very high nitrogen and potassium
- Elevated salts in the upper soil
- Risk of seedling burn if you plant directly into the raw surface
On these zones, you will lean less on added N or K and more on:
- Calcium inputs where appropriate
- Organic matter and humic agents
- Strategic scraping or dilution across a wider area
Step 4: Use Gypsum To Support Structure And Salt Management Where It Fits
Where manure and urine have built up or where sodium and magnesium are an issue, calcium can help.
Supply Solutions Gypsum Powder – Purest and Soluble is a high quality calcium sulfate product that:
- Supplies calcium without raising pH
- Adds sulfur in plant available sulfate form
- Helps improve soil structure and infiltration in specific soil conditions
Gypsum is especially helpful in sacrifice and feeding areas when:
- Soils are clayey, sticky, and seal or crust after rain
- Sodium has accumulated from manure, water, or other sources
- Magnesium is high relative to calcium and structure is poor
Practical guidelines:
- Use soil tests and, where possible, local agronomic advice to confirm gypsum is appropriate.
- Apply gypsum across the “recoverable grass” portion of the pad at label rates once soils are firm enough to support equipment.
- In small or hand worked areas, spread gypsum and lightly incorporate the top half inch to inch with a rake.
- Allow spring rains or irrigation to move soluble calcium and sulfate into the upper soil.
Gypsum is not a one time miracle. It works best as part of a broader plan that includes organic matter, humic support, and changed traffic patterns.
Step 5: Give The Soil Biology A Head Start With HumiPro(K) And Nutri-Proganic
Heavy winter use is hard on more than structure. It is hard on the living side of soil.
To rebuild a functional grass stand, you want:
- Active microbes to cycle manure nutrients
- Better aggregate stability to resist future hoof traffic
- A root zone that can hold water and nutrients instead of losing them between rain events
Two Supply Solutions tools help here:
HumiPro(K) WSP: helping soil hold and organize nutrients
HumiPro(K) is a concentrated, water soluble humic and fulvic acid powder designed to:
- Be mixed into a concentrate and then diluted
- Be applied to soil in spring and through the growing season
- Support nutrient retention, structure, and root development when used as directed
In a reclaimed pad:
- Apply HumiPro(K) after gypsum and basic leveling, following the label for dilution and rates.
- Focus on the sections you intend to reseed and graze again.
- Water in if rain is not expected for several days.
HumiPro(K) helps:
- Bind some of the free nutrients from manure into more stable forms
- Improve cation exchange capacity, especially on light soils or thin topsoil over compacted layers
- Create a better environment for the roots of your new forage species
4-3-2 Nutri-Proganic Pellet: organic fertility and slow feed
4-3-2 Nutri-Proganic Pellet is a chicken manure based pellet that:
- Supplies modest amounts of N, P, and K
- Adds organic matter and micronutrients
- Feeds soil organisms for months, not days
In winter sacrifice areas, Nutri-Proganic works well when:
- You have already scraped and spread the heaviest manure accumulations
- You want a more even, predictable fertility base before you reseed
- You prefer to build fertility and carbon together, not treat them separately
Practical steps:
- Apply Nutri-Proganic at label pasture or garden rates across the “recoverable grass” zones, not on the permanent heavy traffic lanes.
- Lightly incorporate with a harrow, drag, or rake where possible. In strictly no till systems, you can surface apply and rely on moisture and biology, but breakdown will be slower at first.
- Combine with HumiPro(K) to support microbial activity and nutrient efficiency.
Think of Nutri-Proganic as a long fuse fertilizer that will support seedlings through their first season and help rebuild soil function over several years.
Step 6: Add Synthetic N, S, And K Only Where They Are Truly Needed
Once you have:
- Leveled and cleaned the pad
- Corrected structure and salts where appropriate with gypsum
- Fed biology and built a base with HumiPro(K) and Nutri-Proganic
you can think about quick acting fertilizer.
This is where soil tests and field history matter. Winter feed areas already received a lot of manure and urine. It is easy to overshoot on nitrogen or potassium.
When to use ammonium sulfate
Supply Solutions Ammonium Sulfate 21-0-0 + 24% Sulfur provides:
- Quick nitrogen in ammonium form
- Sulfur in sulfate form
- An acidifying effect in the application zone over time
Ammonium sulfate is a good fit on reclaimed pads when:
- Soil tests or crop history indicate sulfur is short, especially in surrounding fields
- You are seeding grasses or grass legume mixes that need early N and S once seedlings are established
- You want to support recovery in the second and third year, after the heaviest manure load has mellowed
It is often wise to:
- Go light on ammonium sulfate in the first season after intense winter use, especially in obvious manure hot spots
- Use more routine N + S supplementation in later years, as the area transitions back into normal pasture management
When to use sulfate of potash
Potassium in winter pads can go two ways:
- Extremely high in manure accumulation zones
- Mixed or low in scraped areas where topsoil has been moved or lost
Sulfate of Potash 0-0-50 Plant Fertilizer is a concentrated potassium sulfate fertilizer that:
- Supplies 0-0-50 analysis
- Adds sulfate sulfur
- Contains no nitrogen and no phosphorus
Use sulfate of potash only when soil tests show K genuinely low or borderline in the area you are rebuilding.
Possible fits:
- On scraped areas where you had to remove a lot of material and now have thin, low K topsoil.
- On reclaimed pads that you plan to use heavily for hay or lush grazing in the future, once manure levels are more balanced.
Apply at soil test guided rates and follow the product label. Avoid adding K to obvious manure hot spots until you have testing that says it is needed.
Where 7-0-26 belongs
Supply Solutions 7-0-26 Nitrogen Fertilizer is a water soluble N and K fertilizer with no P. It is most at home in:
- Fertigation systems
- Precise, high value cropping environments
In most winter pad reclamation projects, 7-0-26 is not the first tool you reach for. It becomes relevant if:
- A reclaimed area is later used for intensive, irrigated forage or specialty crops
- You want tight control of N and K feeding in a smaller, high value paddock or market garden that used to be a lot
For general pasture reclamation, ammonium sulfate, Nutri-Proganic, and sulfate of potash (where tests recommend) are usually sufficient.
Balanced NPK for small farmyards and homesteads
On smaller acreages, especially where a winter lot doubles as a yard area, simple products have value.
Supply Solutions 10-10-10 Complete Lawn & Garden Granular Fertilizer with Micronutrients can be appropriate when:
- A soil test shows P and K are low to moderate, even after winter use
- You have already done basic leveling, organic support, and gypsum where suitable
- You want a straightforward, label based product for reseeded grass in a yard or small paddock
In manure heavy or high P areas, it is better to rely more on organic matter, humics, structure work, and targeted N + S rather than adding more P.
Step 7: Reseeding Strategy For Sacrifice Areas
Seed is the visible part of the reclamation process. It is also the part that fails if the soil work is not done.
A practical reseeding sequence:
- Confirm that the area is ready
- Surface is relatively level
- Standing water has been addressed as much as practical
- Heavy manure clumps are removed or broken up
- Choose species and mixes with staying power
- Use pasture species that match your region and forage system.
- Consider including more traffic tolerant grasses in gates and lanes.
- Work with local seed guidance for specific varieties.
- Prepare a firm, friable seedbed in the reclaimable zone
- Shallow cultivation, harrowing, or aggressive raking may be enough.
- The seedbed should be firm enough that your heel sinks only slightly.
- Apply Nutri-Proganic and any planned synthetic fertilizers
- Follow label rates.
- Avoid heavy N directly in the seed row where manure is already abundant.
- Seed at recommended rates and depths
- Good seed to soil contact matters more than fancy equipment.
- Roll or lightly pack if possible to ensure contact.
- Protect seedlings from overgrazing and traffic
- Keep animals off until grass is well rooted and you cannot pull plants out easily by hand.
- Introduce light grazing first, then gradually increase pressure.
The first season after reseeding is about establishment, not maximum forage production. Be patient and protect your investment.
Step 8: Long Term Management So You Do Not Start Over Every Winter
A reclaimed sacrifice area will slide backward if winter management does not change at all.
Practical improvements:
- Rotate where feeders and bunks sit in winter so one strip does not carry all the burden.
- Use heavy use pads, gravel, or geotextiles in the highest traffic gate and water zones, and aim your fertilizer and reclamation efforts at the adjacent, more recoverable areas.
- When possible, move animals off the pad earlier in spring and onto firmer pasture instead of waiting until the lot is completely exhausted.
- Pull occasional soil tests from reclaimed areas to see how nutrients and organic matter are trending.
You may still need a dedicated winter pad, but the goal is a pad that:
- Sheds water reasonably well
- Does not lose huge amounts of manure nutrients to runoff
- Has adjacent grassed areas that are improving, not degrading each year
A Simple Spring Checklist For Reclaiming Sacrifice Areas
You can post this in the shop as a reminder.
- Clarify the goal
- Which parts of the lot will stay heavy use
- Which parts should become grass again
- Clean and level
- Remove extreme piles of spoiled feed and bedding.
- Smooth ruts and humps without deep inversion.
- Check compaction and water movement
- Note ponding areas and hard layers.
- Plan any small grading or drainage fixes.
- Apply gypsum where appropriate
- Support biology and nutrient efficiency
- Add synthetic N, S, and K only where needed
- Reseed and protect
- Establish the right grass mix and keep animals off until stands are strong.
- Adjust winter use patterns
- Rotate feeder placement, use heavy use pads where warranted, and avoid repeating the same damage pattern every year.
Final Thoughts: Winter Sacrifice Areas Can Become Assets Again
Winter feeding areas are not mistakes. They are necessary tools to protect the rest of your acres from compaction and pugging when soils are most vulnerable.
The key is to:
- Treat them as part of your nutrient management plan, not just “mud pens”
- Use gypsum, humic support, and organic fertility to rebuild structure and biology
- Add synthetic N, S, and K only where soil tests and realistic forage goals say they will pay you back
- Protect new seedlings and adjust winter practices so the same ground does not get destroyed year after year
When you take that approach, tools like:
help turn a rough, necessary part of winter management into a gradually improving patch of soil that can carry grass, support livestock, and hold nutrients where they belong.
If you would like help turning your winter feeding layout, soil tests, and pasture plans into a specific reclamation strategy, the Supply Solutions team is ready to talk through options and connect you with the products that fit your operation.
Supply Solutions is a veteran owned fertilizer and industrial supplier serving farmers, growers, and green industry professionals across the Pacific Northwest and beyond. From organic 4-3-2 pellets, humic and fulvic acids, and soluble gypsum to ammonium sulfate, sulfate of potash, 7-0-26, and 10-10-10, our team is here to help you feed smarter and grow stronger.
Connect with Supply Solutions: